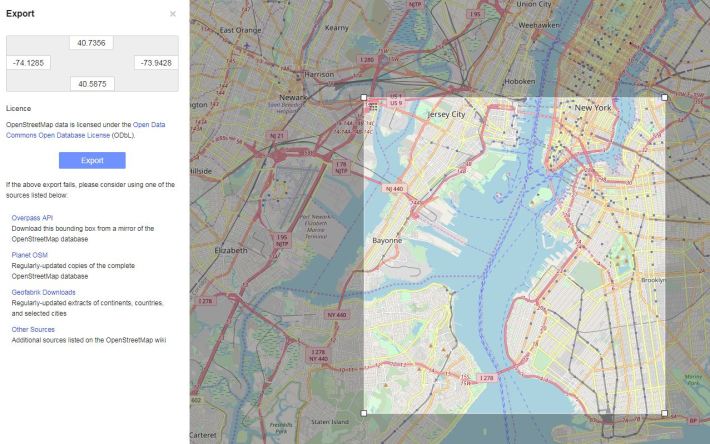
Step 1: Get Manhattan as an OSM map
This is the easy part, you can simply marquee the area you want and download it:

https://www.openstreetmap.org/
Step 2: Add some buildings
You can import the OSM data into Houdini using the Game Dev Toolset:
https://github.com/sideeffects/GameDevelopmentToolset
Lots of code below. I have copy/pasted it from my HIP file, so it’s very messy and lacks a bit of context. Hit me up if you need more details, or something is missing.
Rather than procedurally generating buildings based on the OSM data, I used various stock TurboSquid models, ranging from small residential buildings to large skyscrapers. Google Street Maps to get a vibe for what each area looked like.
Most Turbosquid models come in FBX, which when imported into Houdini come with shaders and textures for Mantra. I wrote a little script to convert those to Arnold shaders, including creating textures. This saved a lot of time, considering there where 100s of buildings.
def convertShaders():
    obj = hou.node('obj')
    shdNode = hou.node('path_to_fbx_shaders')
    shaders = obj.glob(shdNode + '/*')

    for s in shaders:
        aiVopNet = shdNode.createNode('arnold_vopnet')
        aiStandard = aiVopNet.createNode('arnold::standard_surface')
        aiStandard.parm('base').set(1)
        aiStandard.parm('specular').set(0)
        aiStandard.parm('specular_roughness').set(0)
        output = hou.node(aiVopNet.path() + '/OUT_material')
        output.setNamedInput('surface', aiStandard, 'shader')

        textures = []
        diffCol = 0
        fbxShader = s.glob('* ^suboutput')[0]
        print s.path()
        for mapNum in range(13):
            foo = mapNum +1
            map = fbxShader.evalParm('map%d'%foo)
            if map!='':
                #store all texture paths and types
                textures.append([map,fbxShader.evalParm('apply%d'%foo)])
            else:
                #record diffuse color
                diffCol = fbxShader.evalParmTuple('Cd')

        if diffCol !=0:
            #create a image node, connect it to the right input. Diffuse/Refleciton(r)/spec(sf)/normal(nml)/Bump(bump)
            for t in textures:
                if t[1]=='d':
                    image = aiVopNet.createNode('arnold::image')
                    image.parm('filename').set(t[0])
                    aiStandard.setNamedInput('base_color',image,'rgba')
                if t[1]=='sf':
                    image = aiVopNet.createNode('arnold::image')
                    image.parm('filename').set(t[0])
                    aiStandard.setNamedInput('specular',image,'r')
                if t[1]=='bump':
                    image = aiVopNet.createNode('arnold::image')
                    image.parm('filename').set(t[0])
                    bump2d = aiVopNet.createNode('arnold::bump2d')
                    bump2d.parm('bump_height').set(0.05)
                    bump2d.setNamedInput('bump_map',image,'r')
                    aiStandard.setNamedInput('normal',bump2d,'vector')
                if t[1]=='nml':
                    image = aiVopNet.createNode('arnold::image')
                    image.parm('filename').set(t[0])
                    normal = aiVopNet.createNode('arnold::normal_map')
                    normal.setNamedInput('input',image,'rgba')
                    aiStandard.setNamedInput('normal',normal,'vector')
        else:
            #set diffuse color
            aiStandard.parm('base_color').set(diffCol)
        aiName = s.name()
        s.destroy()
        aiVopNet.setName(aiName)
Step 3: Match TurboSquid buildings to OSM Buildings
The only OSM variable I used was ‘height’. Almost all buildings in the OSM map have this attribute, but when it was missing I created a random value that looked roughly correct. I used that to find the closest height match to the Turbosquid buildings. Each individual building was saved as an Alembic. Every Alembic was loaded, and then I loop through each one and worked out their heights:
f@height = getbbox_size(0).y;
I then loop through every single OSM building and find the closest match in height via a Python Sop.
abc= min(abcHights, key=lambda x:abs(x-height))
Min finds the closest value in the array “abcHeights” to the value “height”.
Next, I need to match the size and orientation.
Take an OSM building:

Convert it to lines, measure their length, and sort by longest to shortest.

Take the longest line. This will be the building length. Next use the first/last points to calculate it’s angle (from memory, Matt Estela suggested this, thanks Matt!). This will be the orientation of the building.

Bit of VEX to take care of that:
v@N = normalize(point(0,"P",0) - point(0,"P",1));
N is used to orient the instances.
Next, I find the middle of that line and trace a ray towards the other side of the building (blue arrow). The length of that ray is building width:

Some more fun vex to do that. I trace against an extruded version of the building:
@N = cross(@N,{0,1,0});

vector hit, raydir;
float u, v, conewidth;
int hitprim;

vector Po = point(0,"P",1);

Po.y = Po.y + 0.5; #move the ray orgin up a bit, or it hit floor
Po = (0.2 * @N) + Po;; #bias it away from the wall

i@hitprim = intersect(1,Po, @N*100, hit, u, v);

vector uvw = 0;
uvw.x = u;
uvw.y = v;

vector hitPoint = primuv(1, "P", @hitprim, uvw);

addpoint(0,hitPoint); #this created a point where the ray hits for debug

f@yDist = distance(point(0,"P",1),hitPoint);
Next, I create a point in the centre of the OSM building and add some point attributes.
@scale.z = point(0,"xDist",0);
@scale.x = point(1,"yDist",0);
@scale.y = @fHeight;
@scale =  @scale / getbbox_size(1) ;# 1 is the bounding box of the alembic building
I then write that out to a BGEO point cloud, which also had an ID for each building, so it knows which Alembic to load when instanced.
I used Point Wrangle to add ” intrinsic:abcfilename” attributes to each point, which was loaded by the Arnold Alembic Procedural.
The nice thing about this was the viewport was just a massive point cloud of the city, which is populated at render time. It was a really quick way to work.

Example render! Lots of dodgy bits, but it was good enough for populating areas that were not the main focus. Anything that the camera focused on was a hero element (like lower Manhatten, that is all a TurboSquid model).
The ground texture is Google Maps, downloaded with this tool:
http://www.allmapsoft.com/gmd/
Trees are from Speed Tree, and I used the green areas of the Google Maps images to scatter them around in roughly the right spots.
The land geo is straight from the OSM map.
That’s about it! Easy.
how did you learn how to code in Houdini? I have experience with JavaScript and C#, a little Python, but Houdini stuff is over my head.
LikeLike
This might help:
http://www.tokeru.com/cgwiki/index.php?title=JoyOfVex
LikeLike
Thank you very much for the insights! How did you do the smooth camera movement in the linked video? With a path? How did you control the speed that smoothly?
LikeLike
That was done by the amazing David Smith https://davidsmithanimation.com/
LikeLike
Awesome, thanks! One last question: did you set up the city scene in real life measurements or scaled it down?
LikeLike
Hey, its not real world scale, it would have been way to big. I try and avoid going over 10,000 units. After that you start getting rounding errors. I think i just scaled the city map to fit with in a 10,000 unit square.
LikeLike